Connecting NSOutlineView to Core Data in 10.6 Part 1: Ordered Trees
NOTE: This tutorial is now outdated. I’m leaving it here for posterity, but please know that it may not work.
There are aspects to Cocoa that I find extremely obtuse and difficult to implement. I’m relatively new both to programming and Cocoa, and I suspect that others in the same boat also are frustrated by these steps. The single most frustrating simple thing that I have come across is implementing an NSOutlineView that connects to a Core Data model. There are several ways to approach this problem; primarily with or without Cocoa Bindings and with or without sorting.
There is a good, but outdated tutorial on how to make this work at this link: http://allusions.sourceforge.net/articles/treeDragPart1.php
The primary problem with the tutorials is that it requires the use of private Apple methods, which means that anything you build with it will not be accepted into the Mac App Store. This tutorial draws very heavily on that tutorial, with updated screenshots and code that does not use private APIs. The code also is difficult to read on that page, so it’s updated here in an easier-to-read format. Oh, and one more thing: the example on that page uses a feature of Interface Builder that no longer exists – subclassing within IB.
This tutorial is done with Xcode 3.2.5 on OS X 10.6.6.
The tutorial continues after the break…
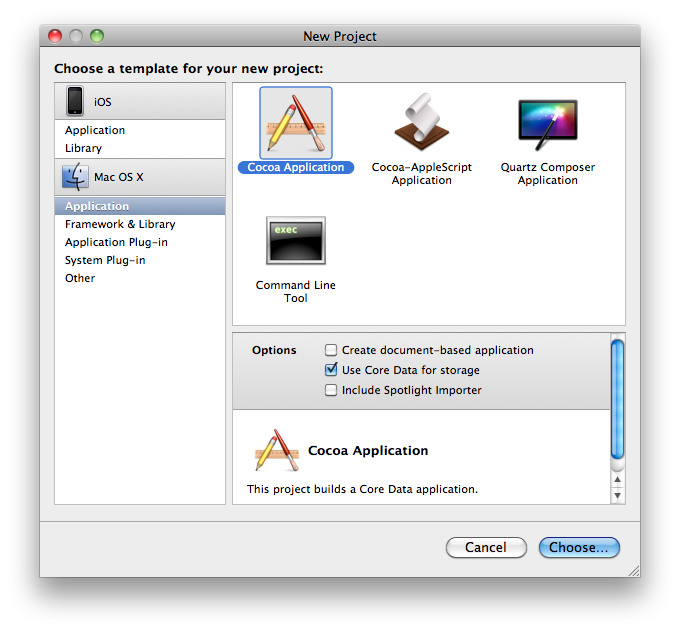
1. Launch Xcode and start a new Core Data Cocoa project. Name it OutlineTest.
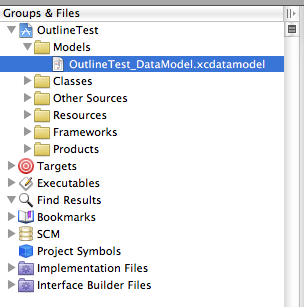
2. In the Groups & Files pane, expand the Models folder and select OutlineTest_DataModel.xcdatamodel to show the Core Data model.
3. Create a Group entity that has 3 properties:

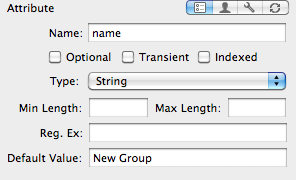
name is a required Attribute that is a String with a Default Value of New Group
parent is an optional Relationship with a destination of Group
– the inverse relationship is subGroups

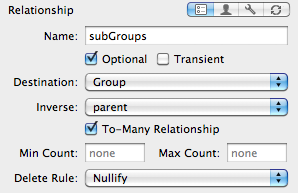
subGroups is an optional To-Many Relationship with a destination of Group
– the inverse relationship is parent
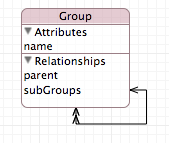
That should complete setup of of the data model. We can infer from this that groups will have the ability to have a single parent group and multiple sub-groups. There is an attribute called “leaf” that you can add the NSOutlineView can use to determine whether a given group should have sub-groups. The term “leaf” comes from the concept of a “tree controller.” Branches can have leaves, but leaves are the end of the line, so to speak, and cannot have sub-groups. We will look at that later.
Save the data model.
4. Double-click on MainMenu.xib (in the Resources group) to open it in Interface Builder. From the Document window, double-click on Window to open the window and/or bring it to the front.
5. Drag an NSOutlineView onto the window from the Library palate. It will look like this initially:
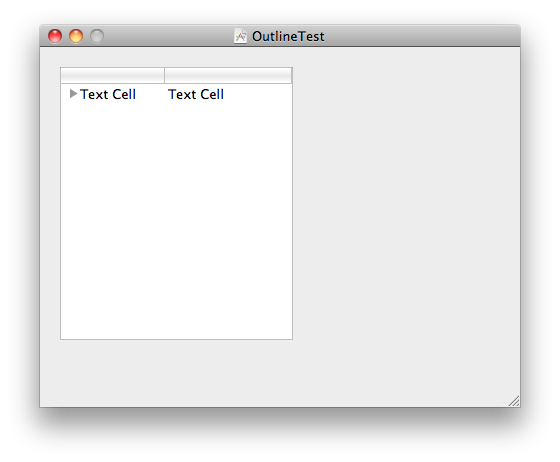 We’re only going to use a single column in this tutorial.
6. Click on the NSOutlineView and keep an eye on the Attributes Inspector. The first time you click on the NSOutlineView, the Inspector should say “Scroll View Attributes.” Click on the NSOutlineView again and the Inspector should say “Outline View Attributes.” The NSOutlineView is embedded in the Scroll View. This is common when you drag an NSTableView or its subclasses to a window in Interface Builder. Change the Columns from 2 to 1:

There are a variety of other settings here that you can play with later in order to change the appearance of the NSOutlineView. I personally do not like it when there is a “Focus Ring” around tables and NSOutlineViews, so I set that to none in the Attributes Inspector. You will find that you have to set it to none for the Scroll View, the NSOutlineView, and for the Table Column.
7. Drag an NSArrayController from the Library Palate to the Document window.

 The Array Controller is going to provide the data source for the root level of the NSOutlineView.
8. With the Array Controller selected in the Document window, change a few settings in the Attributes Inspector panel. Change the Mode to Entity and enter Group in the Entity Name field. Select Prepares Content and enter “parent == nil” in the Fetch Predicate text field.
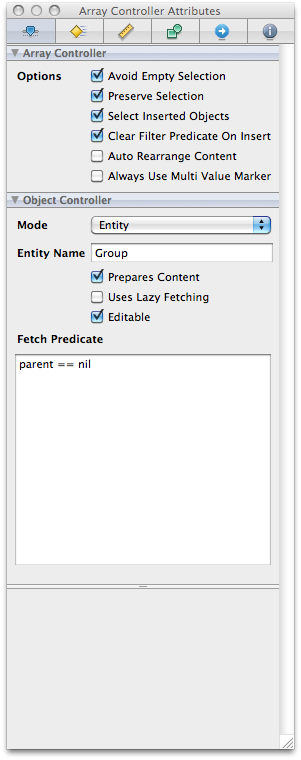 If you remember back to when we set up the model and remember that we’re using this Array Controller to return the “root” level Groups, then the fetch predicate makes sense: the Array Controller only will be in charge of Groups that have a “nil” parent, or in other words, “root” level Groups.
The Array Controller needs to know about the Core Data model if it is to access the Groups. With Core Data, you have several components that you have to work with on a regular basis. The Managed Object Model, usually referred to as “mom” in code, represents the descriptions of the database entities — what we set up in step 3. The Managed Object Context is a little more esoteric: it’s the context through which we access the Core Data store that is described by the Managed Object Model. Think of it this way: you want to watch The Simpsons, which represents the data store. You can either tune in to Fox, watch it on the Internet, or by the DVDs. The method through which you watch it is the Managed Object Context.
For the Array Controller to watch Groups, we have to tell it which context to use.
9. Bind the Managed Object Context to the Array Controller. managedObjectContext is a variable in the App Delegate (which is visible in the Document window). If you look at orderedGroups_AppDelegate.h you will see:
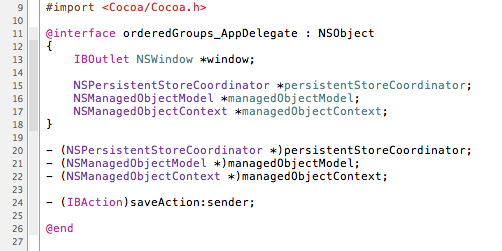
To bind it, select the Array Controller in the Document window and then click on the Bindings tab of the Inspector palate. There is a Managed Object Context section at the bottom of it. You need to bind it to the Application with the keypath delegate.managedObjectContext as shown here:
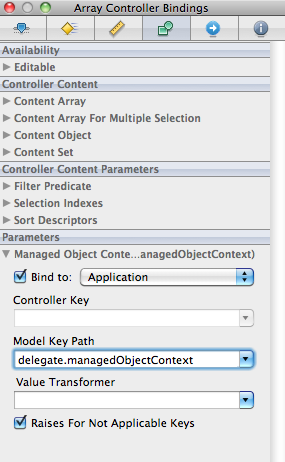
We are done with the Array Controller for now.
10. Drag an NSTreeController from the Library palate into the Document window.

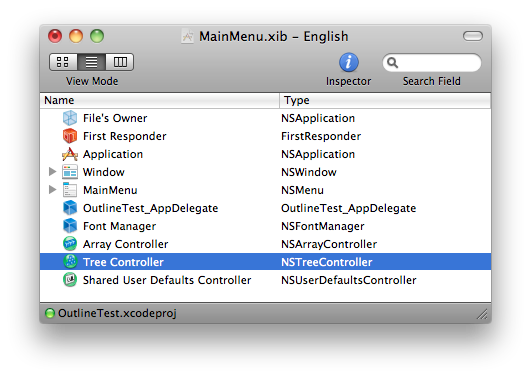
11. Select the NSTreeController in the Document window and open the Attributes Inspector. Set the Mode to Entity and the Entity Name to Group. The NSTreeController serves to provide the functionality by which the NSOutlineView displays hierarchies. You therefore need to set the Children Key Paths to subGroups, as shown here. Also check “Prepares Content.”

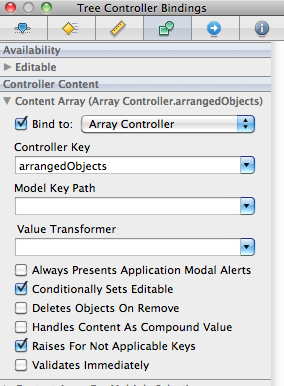
12. Next, open the Bindings Inspector for the NSTreeController and bind its content array to the arrangedObjects key of the Array Controller from the previous steps. The NSTreeController relies on the NSArrayController to provide the managed objects and it then provides to the NSOutlineView the hierarchical structure.
13. Returning to the NSOutlineView… click on it several times until the embedded Table Column is selected. You can tell it is selected when the Inspector says “Table Column” at the top of it. You should have to click 3 times. Once it is selected, go to the Bindings tab of the Inspector and expand the Value section. Bind the Value to the Tree Controller with a Controller Key of arranged objects and a Model Key Path of name.
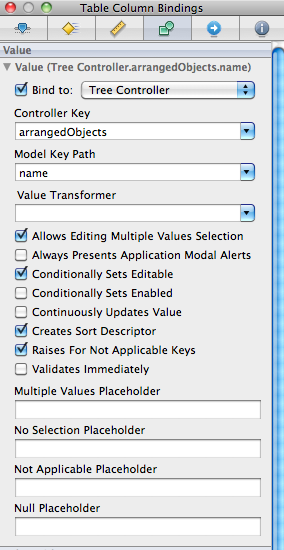
The Tree Controller, which knows how to traverse the tree of objects (that are represented by the Groups at the root level in the Array Controller) will provide the values for the Table Column by displaying the name, as bound here.
14. Locate an NSButton in the Library palate and drag it onto the window, below the Outline View. Change the text on it to say “Add.”
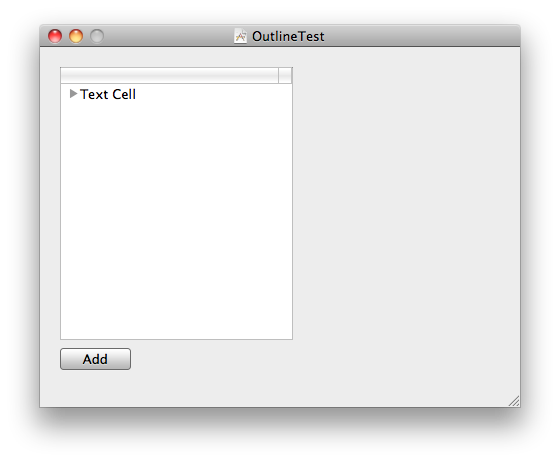
15. Control-click on the Add button and drag to the Array Controller in the Document window and connect it to the add: action. This will allow us to add Groups at the root level.
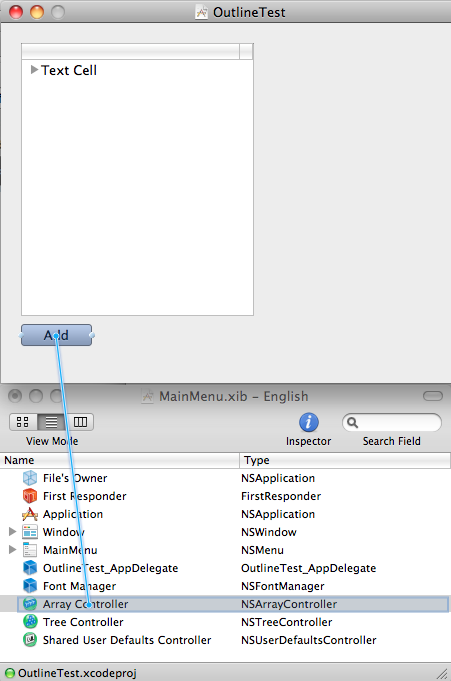
Now select add:
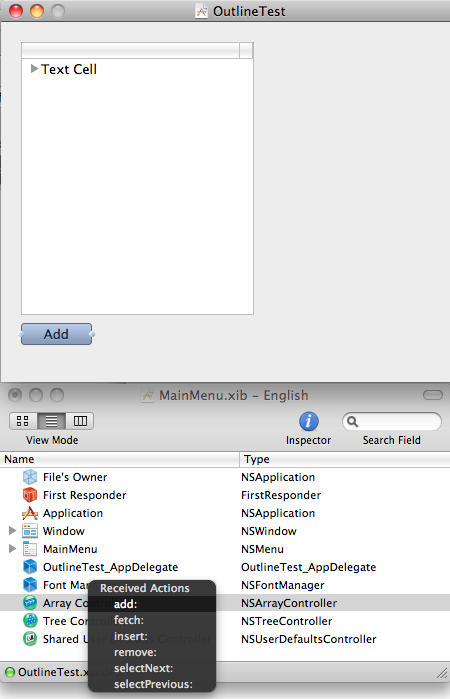
Note: we cannot remove groups in the same manner. At any point, when we click “Add,” a new Group will appear at the root level. If we want to remove a nested Group, however, it will not be part of the array of arranged objects that are handled by the Array Controller because it’s value for parent will not be nil. It is displayed through the NSTreeController. Hence, if we were to connect a delete button to the Array Controller, we would see unexpected behavior when deleting nested groups.
16. Save everything in Interface Builder and compile and run the application.
You should be able to create root node items. If you create several, though, you will notice that you are unable to drag them into groups and that if you quit and run the application again, that they appear in an unpredictable order each time you run it. The good news is that the NSOutlineView is connected to the Core Data model through the Array Controller and the Tree Controller. We have to do a little more work to enable dragging and to make the entries appear in alphabetical order each time the data loads.
17. Head to Xcode, select the Classes group in the Groups & Files pane, and then select New File… from the File menu. Create an Objective-C class that is a subclass of NSObject and name it OutlineViewController. Make sure to select that the header file should be created, too.
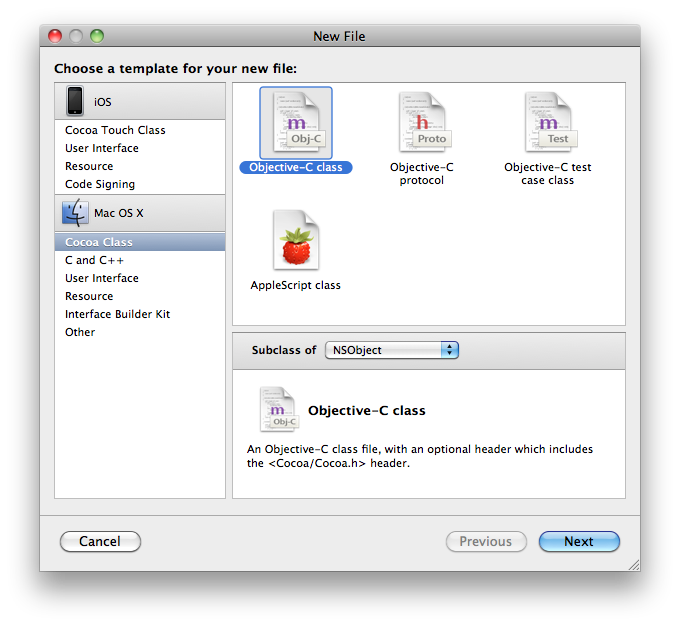
18. Edit OutlineViewController.h so that it appears like this:
//
//  OutlineViewController.h
//  OutlineTest
//
//

#import <Cocoa/Cocoa.h>

@interface OutlineViewController : NSObject <NSOutlineViewDataSource> {

	IBOutlet NSTreeController *treeController;
	IBOutlet NSOutlineView	  *myOutlineView;
	NSArray		*dragType;
	NSTreeNode  *draggedNode;
}

@end
19. Edit OutlineViewController.m so that it appears like this:
//
//  OutlineViewController.m
//  OutlineTest
//
//

#import "OutlineViewController.h"

@implementation OutlineViewController

- (void)awakeFromNib {
	dragType = [NSArray arrayWithObjects: @"factorialDragType", nil];
	[ dragType retain ];
	[ myOutlineView registerForDraggedTypes:dragType ];
	NSSortDescriptor* sortDesc = [[NSSortDescriptor alloc] initWithKey:@"name" ascending:YES];
	[treeController setSortDescriptors:[NSArray arrayWithObject: sortDesc]];
	[ sortDesc release ];
}

- (BOOL) outlineView : (NSOutlineView *) outlineView
		  writeItems : (NSArray*) items
		toPasteboard : (NSPasteboard*) pboard {
	[ pboard declareTypes:dragType owner:self ];
	draggedNode = [ items objectAtIndex:0 ];
	return YES;
}

- (BOOL)outlineView:(NSOutlineView *)outlineView
		 acceptDrop:(id <NSDraggingInfo>)info
			   item:(id)item
		 childIndex:(NSInteger)index {
	NSManagedObject* draggedTreeNode = [ draggedNode representedObject ];
	[ draggedTreeNode setValue:[item representedObject ] forKey:@"parent" ];
	return YES;
}

- (BOOL) category:(NSManagedObject* )cat
  isSubCategoryOf:(NSManagedObject* )possibleSub {
	// Depends on your interpretation of subCategory ....
	if ( cat == possibleSub ) {
		return YES;
	}
	NSManagedObject* possSubParent = [possibleSub valueForKey:@"parent"];
	if ( possSubParent == NULL ) {
		return NO;
	}

	while ( possSubParent != NULL ) {
		if ( possSubParent == cat ) {
			return YES;
		}
		// move up the tree
		possSubParent = [possSubParent valueForKey:@"parent"];
	}

	return NO;
}

// This method gets called by the framework but
// the values from bindings are used instead
- (id)outlineView:(NSOutlineView *)outlineView
objectValueForTableColumn:(NSTableColumn *)tableColumn
		   byItem:(id)item {
	return NULL;
}

- (NSDragOperation)outlineView:(NSOutlineView *)outlineView
				  validateDrop:(id <NSDraggingInfo>)info
				  proposedItem:(id)item
			proposedChildIndex:(NSInteger)index {
	// drags to the root are always acceptable
	if ( [item representedObject] == NULL ) {
		return NSDragOperationGeneric;
	}
	// Verify that we are not dragging a parent to one of it's ancestors
	// causes a parent loop where a group of nodes point to each other
	// and disappear from the control
	NSManagedObject* dragged = [ draggedNode representedObject ];
	NSManagedObject* newP = [ item representedObject ];
	if ( [ self category:dragged isSubCategoryOf:newP ] ) {
		return NO;
	}
	return NSDragOperationGeneric;
}

/* The following are implemented as stubs because they are
 required when implementing an NSOutlineViewDataSource.
 Because we use bindings on the table column these methods are never called.
 The NSLog statements have been included to prove that these methods are not called. */
- (NSInteger)outlineView:(NSOutlineView *)outlineView
  numberOfChildrenOfItem:(id)item {
	NSLog(@"numberOfChildrenOfItem");
	return 1;
}

- (BOOL)outlineView:(NSOutlineView *)outlineView
   isItemExpandable:(id)item {
	NSLog(@"isItemExpandable");
	return YES;
}

- (id)outlineView:(NSOutlineView *)outlineView
			child:(NSInteger)index
		   ofItem:(id)item {
	NSLog(@"child of Item");
	return NULL; }

@end
The alphabetical sorting is established in the awakeFromNib method. The writeItems and acceptDrop methods handle the drag and drop functionality.
20. Return to Interface Builder because we have to connect the outlets and set the datasource for the NSOutlineView.
21. Find a “blue cube” NSObject in the Library palate and drag it into the Document window. Select it, and then open the Identity Inspector. Change the Class to OutlineViewController. This cube now represents the code that we just put in Xcode. (Most of the code, by the way, was directly taken from http://allusions.sourceforge.net/articles/treeDragPart1.php but altered so as not to use the private and depreciated Apple API).

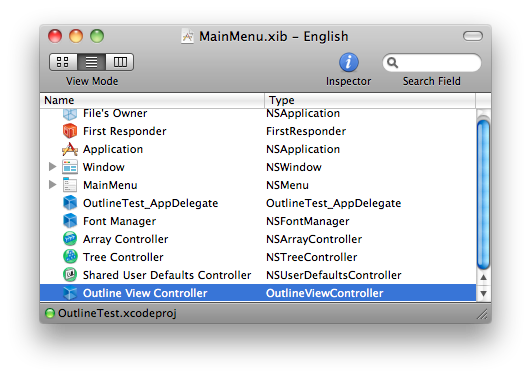
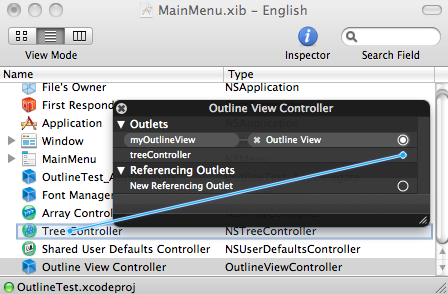
22. Control-click on the Outline View Controller in the Document window to display it’s panel of outlets and actions. Drag from the circle next to myOutlineView to the NSOutlineView in the window and then release. This sets the IBOutlet to reference the outline view.

23. Drag from the circle next to treeController to the Tree Controller in the Document window.
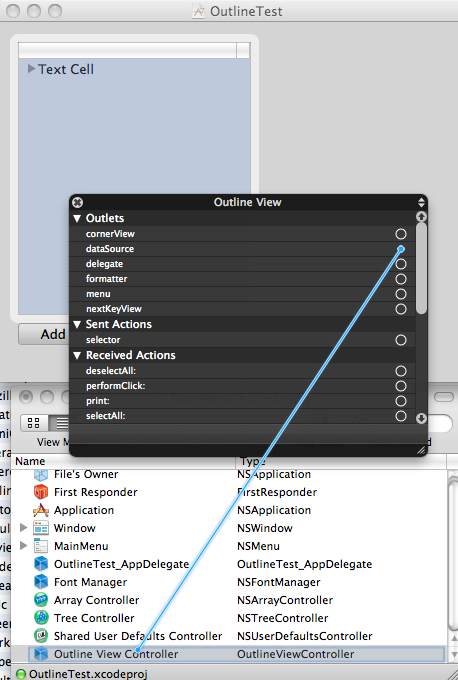
24. Finally, we need to set the Outline View Controller to be the datasource of the NSOutlineView in which we will display our groups. Click on the NSOutlineView until it is selected (2 times – you will see “Outline View …” in the Inspector panel). Control-click on the outline view to display its connections panel. Drag from the circle next to dataSource to the Outline View Controller and release.
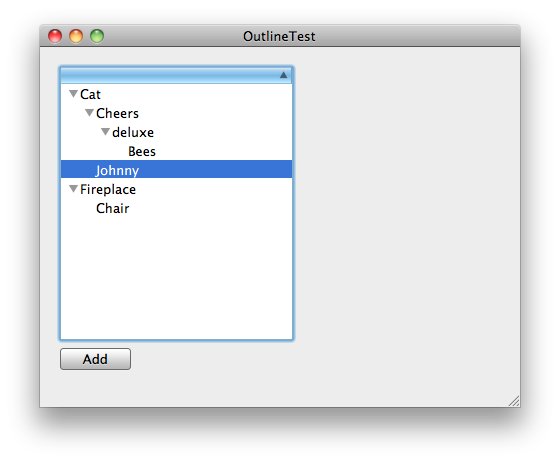
That completes the wiring of the outlets and actions in this part of the tutorial. Save in Interface Builder, return to Xcode and make sure that everything is saved, and then Compile and Run the project. You should be able to create Groups and drag them into other groups to create your own hierarchy of groups.
I will update Part 2 of the original tutorial in the near future.
thanks for that!
waiting for part 2.
mgil
Mario
February 14, 2011 at 16:01
Thanks! I’ll try to get to it in a day or two.
Clay
February 14, 2011 at 16:27
Hmm, I just noticed that WordPress.com mangled the embedded code… I’ll see if I can rectify that quickly.
Clay
February 14, 2011 at 16:31
Ok, the mangled code is fixed. Don’t know what happened there… ghost in the machine, I suppose.
Clay
February 14, 2011 at 16:44
Nice job and well laid out. I was looking for something just like this. I’m an old hand at programming (Visual Studio) but new to Cocoa and these type of tutorials are golden.
Thanks Again
Bill
February 22, 2011 at 14:38
Nice tutorial but there’s no need for the Array Controller. All the configuring you do to the Array Controller, you should do to the Tree Controller — they are basically the same objects (both inheriting from NSObjectController) but NSTreeController is better at dealing with hierarchical data.
Elise van Looij
March 2, 2011 at 16:44
Ok, thanks. I just was copying the steps from the other tutorial while I updated it. How do you populate the root items in the NSOutlineView using the tree controller?
Clay
March 2, 2011 at 16:48
Great tutorial. Thanks Clay!
Isaac Rivera
April 22, 2011 at 04:49
Is the part 2 still in the works?
Isaac Rivera
April 22, 2011 at 05:47
I’d like to get to it but I’m very busy being a full time dad and working full time! Maybe soon – for now, follow the link to the original tutorial that I updated for this part. Thanks!
Clay
April 22, 2011 at 07:28
Great tutorial, thanks. Could you elaborate more on the use of ‘leafs’? You touch on it briefly, but there is no more mention in the rest of the article.
Koen van der Drift
October 9, 2011 at 11:21
Hi Koen, It’s been a while since I’ve visited this topic; busy year! When working with tree diagrams, however, a leave is a terminal node. In other words, a node that won’t have any children. I’m sorry I cannot provide you more detail on the Cocoa implementation right now, but maybe that helps! I hope to return to this and update it for Lion someday. :)
Clay
October 10, 2011 at 08:06
Hi Clay, thanks for your response. I hear you about having not much time :)
First, your example works fine with Lion/Xcode4, so no need to make any changes! Second, I’ll keep looking for a way to implement leaves; there are many tutorials out there, but none of them (that I found) uses recursive groups *and* leaves. I’ll post back here when I figured it out.
Koen van der Drift
October 12, 2011 at 09:21
Very useful tutorial! Thanks for posting this.
Rogier
November 20, 2011 at 12:51
Thanks for the tutorial! I, for one, am still eager to see part 2!
Brian
February 18, 2012 at 15:21
I’d love step 2 :)
Gareth Price (@iamgp)
March 31, 2012 at 22:12
Thanks for this useful training but when I’m using xcode 4.2 the compiler give me an error !
What should I do?
Navid
May 3, 2012 at 03:30
Hi , treeController does not work ,I’m using Xcode 4.3 please Help
David
May 5, 2012 at 03:12